Gif

Gif

Saturday 9 January 2016

Novo blog!! :) / I have a new blog!!

Primeiro post do meu novo blog!!! Em http://pataniscaverde.blogs.sapo.pt/ :)

****

First post of my new blog!!! In http://pataniscaverde.blogs.sapo.pt/ :)

Friday 20 November 2015

1 ano sem congelador!! *1 year without freezer!!*

***Scroll down for the English Version***


Um ano.. um ano já passou, o tempo passa a correr! E a conclusão é simples, sobrevivi!! :) Ajudou-me a equilibrar um bocadinho mais a quantidade de comida que compro, a quantidade de comida que cozinho (se bem que às vezes, entusiasmo-me e cozinho um bocado demais daquilo que devia) e aprendi a preservar e conservar algumas comidas e também descobri novos sabores e novos tipos de comida! Posso assumir que foi um ano bastante positivo!! :)

Agora é altura de seguir em frente! Provavelmente ainda vou ficar mais uns meses sem congelador e, entretanto, vou voltar para o meu país. Lá tenho um frigorífico pequeno, mas com congelador, no entanto o que aprendi não será esquecido. Vou continuar a ir ao mercado ou à mercearia e comprar o que preciso para a semana, sem desperdicar comida. Também tenciono ampliar a minha horta urbana e se for bem sucedida vou precisar do congelador de certeza. E vou voltar aos meus smoothies e gelados!! :)

E muito provavelmente vou mudar o nome do blog, por isso a todos vocês que me acompanham nesta jornada e leêm os meus posts, por favor, SUGIRAM nomes, tanto faz serem em inglês ou português. E provavelmente também vou abracar a minha paixão, cada vez maior - cozinhar - e abrir um pequeno café/restaurante e partilhar o amor que sinto pela comida com o mundo! <3 E também vou testar filmar algumas das minhas experiências na cozinha, vamos ver se corre bem!

Até à próxima, meus leitores! Até uma próxima, e muito provavelmente já com um congelador ;)

E lembrem-se, evitem desperdicar comida, vivam sem desperdício e sem plástico o máximo que conseguirem, em prol da saúde do nosso lindo e maravlhoso planeta!!


****


One year.. one year has passed already! And I guess the conclusion is pretty simple, I survived!! :) It also helped balance a bit more the amount of food I buy, the amount of food I cook (although sometimes I am over enthusiastic and cook a bit more than I should) and I learned how to preserve some foods and I discovered new types of food and flavours! I guess it was pretty positive year!! :)

Now it is time to move on! I will still live a couple of months more without freezer and will move back to my country. There I have a small fridge with freezer, but what I learned won't be forgotten. I will still go to the farmer's market or to the grocery shop and buy what I need for that week, no food waste, but I am planning to start a bigger urban garden and if that is successful I will need the freezer for that. And I will be back to my smoothies and icecreams!! :)

I will most likely change the name of the blog, so for those of you who have been reading my posts, please DO suggest some names, either english or portuguese. And I will probably embrace my growing passion - cooking/baking - and open a small café/restaurant and spread the love I feel about food with you! <3 I will also start testing doing some cooking videos out of my experiments in the kitchen, let's see how that goes!

See you soon, my readers! Until next time, most likely with a freezer ;)

And remember, avoid food waste, live zero waste and plastic free as much as possible for the health of our lovely and wonderful planet!!


Saturday 31 October 2015

Memórias e Halloween *Memories and Halloween*

***Scroll down for the English Version***


Halloween!..

Confesso que já achei mais piada do que acho agora, a ideia de as bruxas andarem entre nós é atractiva, mas ao mesmo tempo ponho-me a pensar se não é mais uma forma de incentivar o consumismo e o desperdício.. Há mais ou menos uma década devo ter começado a celebrar o Halloween e sempre fiz os meus disfarces com roupas velhas, minhas, usadas ou compradas em 2ª mão ou feitas com cartões e sempre me diverti muito a fazer isso. Tal como no Carnaval, nunca fui de comprar fatos e máscaras de propósito e se comprar algum adereço, guardo numa caixa que tenho, onde ano após ano, vou vasculhar e procurar uma fantasia apropriada! Reciclo e Re-uso! #DesperdícioZero

Mas o que gosto bastante em qualquer feriado, é que é sempre uma óptima desculpa para cozinhar e fazer qualquer coisa diferente! :) Este ano experimentei fazer uma "Tarte Crua de Abóbora". Já tinha feito uma anteriormente para os meus anos e adorei a simplicidade e facilidade de execução. E obviamente, o sabor!! Tenho andado a seguir alguns blogs e youtube de modos de vida e receitas saudáveis e descobri este. Tem receitas muito simples e fáceis de fazer, saudáveis e cheias de sabor, vale a pena dar uma olhadela. E que me deram inspiração para fazer esta tarte! A abóbora que usei é uma Hokkaido, laranja-cor-de-Halloween, biológica! Agora existe em todo o lado, mas esta receita pode ser feita com qualquer tipo de abóbora.

Fica a receita para quem quiser experimentar e estejam à vontade para mudar de frutos secos ou alterar as especiarias! A ideia é cada um dar-lhe um toque especial! ;)


Tarte Crua de Abóbora (Faz cerca de 10 fatias)

  • Ingredientes  
Base:2 1/2 xícaras de frutos secos (usei nozes e pecans)
8 tâmaras, sem caroço (demolhadas em água quente cerca de 10 minutos)
1/4 c. chá de extracto de baunilha (usei um que fiz com vodka russa, yummy!)
1/4 c. chá de sal
1-2 c. sopa de água

Recheio:3 xícaras de abóbora picada finamente
1 1/2 xícara de leite de coco
20-25 tâmaras, sem caroço
1/2 xícaras adoçante preferido (usei mel)
1 c. sopa de extracto de baunilha
2 c. chá de gengibre, em pó
2 c. chá de canela, em pó
1 c. chá de noz moscada, em pó
1/8 c. chá de açafrão-das-índias, em pó
1/8 c. chá de sal

  • Preparação:
1. Base: Colocar os frutos secos num processador ou robot de cozinha e pulsar até ficarem grânulos.

2. Adicionar os restantes ingredientes e ir pulsando até obter uma massa em grânulos, que seja fácil de moldar com os dedos, adicionar água aos poucos, se necessário - colocar essa massa numa forma redonda, de fundo amovível, com cerca de 20 cm de diâmetro, por forma a cobrir o fundo uniformemente e as paredes da forma. Reservar.

3. Recheio: Descascar a abóbora e retirar as sementes (podem e devem ser tostadas e dão um óptimo snack!) e picar num robot de cozinha.

4. Adicionar todos os ingredientes e processar até obter uma massa cremosa. Colocar no topo da base e levar ao frigorífico, no mínimo 6 horas ou durante a noite. Decorar a gosto.


Linda e saborosa!!!!

E nada se desperdiça! Com o que sobrou da abóbora, que comprei uma grande, ainda vou fazer sopa e um caril com batatas!!


O dia de hoje também me faz pensar que há 5 anos vim morar para Helsínquia.. Ao início foi fantástico! Apesar de já andar por este país há mais anos, vinha morar mais definitivamente e no dia em que cheguei começou a nevar. Foi um Inverno bom, não típico para o sul da Finlândia nevar naquela altura, mas bom porque começou a never em Outubro e o Natal foi um Natal branco, cheio de neve e lindo! O que contribuiu ainda mais para a excitação, porque eu sendo de Lisboa, nunca tinha visto neve!! Este ano ainda não neva e as sensações estão mais calmas.. Cada vez mais saudades de Portugal, mas vou distraindo-me na cozinha com novas experiências!

As nostalgias continuam. Há quase um ano atrás iniciei este blog porque fiquei sem congelador. A esta altura não tenho, não o arranjei e tenho conseguido viver sem ele! Forçou-me a controlar a porção de comida que compro, para evitar que se estrague e ainda tenho arestas a limar na parte de cozinhar - de alguma forma acho que vivem mais 3 pessoas comigo e cozinho quantidades absurdas!! E durante este ano houve muitas peripécias, o verão foi particularmente difícil, porque não podia comprar gelados, ou arriscava a ter uma overdose por comer uma embalagem inteira e o consumo de smoothies com frutas congeladas também diminuiu, mas fui arranjando alternativas, sempre a testar, errar, aprender e melhorar e cá estou! (Quase) um ano sem congelador, aqui estou a tentar fazer delícias de ingredientes naturais, biológicos, não processados e saudáveis! Devo dizer que estou no bom caminho (pelo menos sabe bem!) ;)


****


Halloween!..

Truth be told I am not so enthusiastic anymore about Halloween. It is true that I like the idea that on this day&night the witches are among us, but at the same time I wonder if it is not just another way to induce and encourage buying and waste.. Around a decade ago, more or less, I think I started celebrating it and I always did my own costumes, either using my old clothes, used or bought 2nd hand or even made out of cardboards and other materials and I always had fun doing them. Just like for Carnival, I never bought any costume and if I have to buy some accessory, I have a box where I keep all of them and throughout the years I go there and search for something I can use again! I recycle and I Re-use! #ZeroWaste

But what I like the most in any holiday, is that it is always a good excuse for me to cook something different! :) Now I tried a "Raw Pumpkin Pie". I had done before another raw pie for my birthday and I was marveled by the simplicity and how easy it is to do. And obviously, the taste of it!! I have been checking out and following some healthy style/healthy recipes blogues and youtube channels and I found this one out. It has really simple and easy recipes, healthy and full of flavour. It is worth it to check it out! And it inspired me to make this raw pie! The pumpkin I used is an Hokkaido, orange-Halloween-colour, organic! Nowadays it is easy to find it everywhere, but for this recipe you can use any type of pumpkin.

Here is the recipe if you want to try it out e please feel free to change nuts ou spices! Give it your personal touch, that is the idea and beauty of cooking! ;)


Raw Pumpkin Pie (Serves about 10)

  • Ingredients  
Crust:2 1/2 cups of walnuts and pecans
8 dates, pitted (soaked in hot water for about 10 minutes)
1/4 tsp vanilla extract (I made my own with Russian vodka, yummy!)
1/4 tsp salt
1-2 Tbsp water

Filling:3 cups shredded pumpkin
1 1/2 cup coconut milk
20-25 dates, pitted
1/2 cup sweetener (I used honey)
1 Tbsp vanilla extract
2 tsp ground ginger
2 tsp ground cinnamon
1 ts ground nutmeg
1/8 tsp ground turmeric
1/8 tsp salt

  • Directions:
1. Crust: Add the nuts to a blender and blend until ground.

2. Add the remaining ingredients and blend until ground but easy to retain shape with fingers, add bits of water, if needed - put the mix in a round 20 cm diameter baking tray, covering uniformly the bottom and walls of the baking tray. Reserve.

3. Filling: Peel and remove seeds from pumpkin (they can and should be toasted to have a great, amazing snack!) and shred in a kitchen robot.

4. Add all the remaining ingredients and blend until you have a smooth texture. Put on top of the crust and refrigerate, for a minimum of 6 hours or overnight. Add toppings of choice.


Beautiful and tasty!!!!

And no waste! With what is left from the pumpkin, because I bought a big one, I will still do a soup and a curry with potatoes!!


Today is a nostalgic day, it makes me wonder back to 5 years ago when I came to live in Helsinki.. At the beginning it was just amazing! Despite coming here since earlier years, I came and live more definitely here and the day I arrived started snowing. It was a good winter, not so typical for the south of Finland to snow that early, but good because it started snowing in October and that year it was a white X-mas, full of snow and beautiful! Of course, that increase the euphoria and excitation, especially because, me bring from Lisbon, never had seen snow before!! This year there is no snow yet and the feelings are more calm.. Each time missing Portugal more and more, but I distract myself going to the kitchen and trying new things!

Nostalgia goes on. Almost one year ago I started this blog because my freezer broke. I still don't have one, I did not fix it and I have been managing quit well, surviving without it! It forced me control the amount of food I buy, in order to avoid waste and the cooking still needs a bit of work - somehow I have this idea that 3 more people live with me so I cook ridiculous huge amounts of food!! And during this year a lot of things happened and a ton of adventures, the summer was particularly hard to endure, I couldn't buy icecreams, because either I would have an overdose for eating too much icecream or it would go to the garbage, melted, because I couldn't it all and I reduced the amount of smoothies, with frozen fruits, as well. But I was finding alternatives, always testing, going wrong, learning and improving and here I am! After (almost) one year without freezer trying to make delicious things out of natural ingredients, organic, non-processed and healthy! I must say I am in the right track (at least it tastes good!) ;)

Monday 15 June 2015

Receitas "tradicionais" *"Traditional" recipes*

***Scroll down for the English Version***


No outro dia, não tive vontade de andar a "inventar" receitas. Queria algo que me lembrasse a casa da minha mãe e fosse adequado à marmita, já que levo sempre o almoco para o trabalho. Também como é a altura das Festas Populares em Lisboa, deu-me a nostalgia... este sempre foi um prato típico em minha casa, para esta altura do ano. E lembrei-me de bacalhau, talvez por ser a comida mais comum em Portugal e apeteceu-me bacalhau à brás, mas obviamente sem o bacalhau! Resolvi usar tofu, firme! Não seria nada difícil adaptar a receita, já que, excepto o bacalhau, são ingredientes de origem vegetal, batata, cenoura, cebola, ... A dificuldade veio mais de pressionar o tofu... usei então 2 embalagens de tofu firme e quando fui pressionar, para escorrer a água acumulada, tive de ser criativa! Deu nisto!!


Fui buscar todos os livros de culinária que tenho andado a ver na biblioteca e tenho um tofu press instantâneo!! Resultou às 1000 maravilhas! Pressão durante 10-15 minutis, o tofu largou a água, coloquei papel de cozinha e absorveu essa água e depois foi só cortar aos cubos e temos o tofu pronto a cozinhar. 

O resto dos ingredientes. Cebolas e cenouras e outros vegetais são relativamente fáceis de encontrar por aqui na Finlândia, com alguma qualidade. As batatas palha também encontrei no LIDL sem problema, as natas vegetais trouxe de Portugal.. sim, de Portugal! Pode parecer estranho, mas numa das minhas idas ao meu belo país, descobri uma marca nova de leites e natas vegetais. Infelizmente, ainda não tive oportunidade de provar o leite, mas comprei um pacote de natas e veio a viajar comigo! Juntei ao tofu à brás, que ficou delicioso! Estou fã dos produtos da Shoyce. E o bom de dar uma vista pelo site, é que descobri que muito brevemente vou deixar de viajar com pacotes de natas na mala, porque vêm para a Finlândia!! :) E nada me dá mais satisfacão do que comprar produtos de Portugal por aqui!! :)

Mas aqui está a receita:

Ingredientes:

- salsa a gosto
- 2-3 cenouras médias, raladas
- 1 cebola
- cerca de 100g de Polpa de tomate (usei uma com pedacos de pimento vermelho)
- 1 c. chá de noz moscada
- 1 c. chá de tomilho seco
- 1 c. chá de mangericão seco
- 2 embalagens de tofu firme (cerca de 500g)
- 4 c. sopa de azeite
- 2-3 folhas de louro
- 80g de leite de soja (usei o do LIDL)
- 85g de natas de soja (usei Shoyce)
- sumo de 1/2 limão
- 1 c. chá de acafrão em pó
- 1 embalagem de 200g de batata palha frita (usei umas embalagens pequenas do LIDL, de 120 g, para não ficar com muitos fritos e óleo)

Instruções:

1. Picar a salsa e reservar.

2. Ralar a cenoura. Picar a cebola e juntar tudo num tacho para refogar num fio de azeite, cerca de 5 minutos, em lume médio-alto.

3. Adicionar a polpa de tomate, a noz moscada, o tomilho e o mangericão seco e misturar bem num prato fundo ou tigela. Adicionar cerca de metade da sala picada. Misturar com o tofu, por forma a cobrir bem.

4. Adicionar o azeite e as folhas de louro ao refogado e deixar mais uns 3-4 minutos, em lume médio.

5. Acrescentear o tofu envolvido na mistura com molho de tomate e deixar cozinhar cerca de 10 minutos e mexer de vez em quando.

6. O molho preparei na Bimby (5 seg, vel 3), mas pode ser batido numa tigela. Juntar o leite, as natas, o sumo de meio limão e o açafrão em pó. Misturar bem.

7. Entretanto, no final de cozinhar o tofu, retirar as folhas de louro e acrescentar a batata palha aos poucos e envolver com o tofu.

8. Regar com o molho e levar a lume médio, mais 5 minutos, mexendo para não pegar. Decorar com a restante salsa e azeitonas.


O sabor estava delicioso e a textura muito cremosa, devido às natas!! Adorei!! E mesmo não sendo bacalhau transportou-me para dias quentes de Junho em Portugal, quando era crianca...


***


The other day, I was feeling lazy to "come up" with a recipe. I wanted something to remind me of my mom's place e at the same time, nice for the lunchbox, since I take my lunch to work everyday. It is also the month of the Festivities of Popular Saints in Lisbon, I was homesick... this was always one the typical dishes at my house, for this time of year. And I remembered codfish, perhaps because it is the most common food in Portugal and I started craving for Codfish "à brás", but obviously without the cod! I decided to replace it by firm tofu! It wouldn't be too difficult to adapt the recipe, since, except the cod, the other are vegetable ingredients, like potato, carrot, onion, ... The problem came when I needed to press the tofu... I used 2 firm tofu packages and I had to be creative, to press it and release the water in it! So this is what happened!!


I picked up all the cookbooks I had from the library and instantly I had a tofu press!! It worked out perfectly! Pressure for about 10-15 minutes, tofu was dry enough, I had kitchen paper to absorb the water and all I need to do after was to cut the tofu in small cubes and it was ready for cooking. 

The remaining ingredients. Well, onions and carrots and some other veggies are relatively easy to find here in Finland, with good quality. The potato sticks I found in LIDL, with no problem, and the cream I brought from Portugal.. yes, from Portugal! It might seem weird, but when I was there in Portugal, my beautiful, beautiful country, I discovered a new brand of soy milk ad cream. Unfortunately, I still did not have the chance to try the milk, but I bought a cream package and it traveled with me! I added it to the tofu "à brás", and it was delicious! I am a big fan now of Shoyce products. And while I was checking the website, I found out that pretty soon I will stop travelling with cream packages in my luggage, because Shoyce is coming to Finland!! :) And nothing gives more pleasure than to buy Portuguese products abroad!! :)

Here is the recipe:

Ingredients:

- parsley to taste
- 2-3 medium carrots, grated
- 1 onion
- about 100g of tomato sauce (I used one with pieces of red bell pepper)
- 1 tsp of nutmeg
- 1 tsp of dried thyme
- 1 tsp of dried basil
- 2 firm tofu packages (about 500g)
- 4 Tbsp of olive oil
- 2-3 bay leaves
- 80g of soy milk (I used the one from LIDL)
- 85g soy cooking cream (I used Shoyce)
- 1/2 lemon, the juice
- 1 tsp of turmeric powder
- 200g package of potato sticks (instead, I used 120g of potato sticks from LIDL, so it wouldn't be too greasy)

Instructions:

1. Chop the parsley and reserve.

2. Grate the carrot. Chop the onion, finely and add everything to a large pan and sautée in a bit of olive oil, for about 5 minutes, in medium-high heat.

3. Add the tomato sauce, nutmeg, thyme and basil to a mixing bowl. Add about 1/2 of the chopped parsley and mix with the tofu, covering well.

4. Add the bay leaves to the pan and cook for more 3-4 minutes, in medium heat.

5. Add the tofu with the tomato mix and let it cook for about 10 minutes, stirring occasionally.

6. I prepared the sauce in Bimby (5 sec, speed 3), but it can be whisked in a bowl. Add together the milk, cooking cream, lemon juice and turmeric. Mix well.

7. Meanwhile, after the tofu is cooked, take off the bay leaves and add the potato sticks slowly and mix with the tofu.

8. Drizzle the sauce over it and cook in medium heat, 5 more minutes, stirring not to stick to the bottom of the pan. Sprinkle with the remaining parsley and add some olives.


Super delicious e very creamy texture, due to the cooking cream!! I <3 it!! And even if it is not codfish it took me back to warm summer days of June in Portugal, when I was a child...

Friday 12 June 2015

O meu primeiro bolo "cru" *My first raw cake*

***Scroll down for the English Version***


Adoro cozinhar! Adoro cozinhar pratos diferentes todos os dias! Adoro cozinhar sopas! Adoro cozinhar para um grupo de amigos e adoro cozinhar só para mim! Adoro fazer bolos!

Claro que o melhor disto tudo é satisfacão final e poder comer tudo o que cozinhei ou ver na cara dos amigos que estão a gostar do que com tanto carinho fiz!

Ora bem, raw cakes ou bolo "cru", no sentido em que não vai ao forno. Também não leva leite, ovos ou ingredientes que eu retirei da minha dieta. Não poderia ser mais simples certo? Já tenho visto imensas receitas, fotos e também já vi em cafés de raw food. E decidi experimentar, fazer um raw chocolate caramel pecan cake. Devo dizer que correu muito bem :) Foi para o dia dos meus anos e decidi fazer um bolo pequeno que desse para dois, fui procurando receitas na internet e dei de caras com esta receita (sim, ainda não estou tão avancada em raw food que consiga criar um raw cake de raíz, mas assim que fazemos o primeiro é fácil e muitos mais virão!).


Sigam a receita para ver quão fácil é e o sabor é delicioso! Óptimo para dias de calor! E além disso, não leva acúcar e é bastante saudável!!

Ingredientes

1. Bolo:
1 xícara de nozes pecan (Pode ser um copo de iogurte, o importante é que seja sempre a mesma medida)
1 xícara de tâmaras (preferencialmente das sem brilho)
1 c. chá de baunilha
2 c. sopa de cacau em pó

2. Caramelo (recheio)
3/4 xícara de tâmaras
1 c.chá de baunilha
canela e noz-moscada, em pó (cerca de 1/2 c. chá de cada, só para dar sabor) - para a próxima vou adicionar cardamomo em pó
2 c. sopa de óleo de coco, derretido
água (usei um pouco menos que 1 copo de água)

Preparacão

1. Para fazer o bolo: colocar as nozes pecan num processador de comida ou robot de cozinha (eu tenho a facilidade de ter uma bimby) e processar até ficarem do tamanho de migalhas. Adicionar os restantes ingredientes e processar até ficar uma pasta. Numa forma redonda de 16 cm de diâmetro, preferencialmente daquelas que sae a parte do lado, pressionar esta pasta com os dedos, como se fosse uma base de quiche e deixar os lados um pouco mais elevados, para depois se deitar o caramelo no meio. Levar ao frigorífico --> fiz esta base no dia antes e ficou de noite no frigorífico.

2. Para fazer o caramelo: colocar todos os ingredientes num processador e processar até obter um creme como se fosse caramelo, adicionar água aos poucos, para obter essa textura. Depois, é só colocar em cima da base, pode escorrer para os lados, para ficar com um ar mais apetitoso! Cobrir com frutos secos a gosto, eu usei nozes pecan!


Mais fácil não há!!


****


I love to cook! I love to cook different dishes everyday! I love to cook soups! I love to cook for a group of friends and I love to cook just for myself! I love to bake!

And of course, the best of it all is being able to eat all that at the end of the cooking and see my friends face while they are enjoying what I did with so much heart into it!

Oh well, raw cakes are weird, but it in the sense that they don't go to oven. They also don't have milk, eggs or other ingredients which I don't eat anymore. It couldn't be more simple, right? I have seen on the internet, tons of recipes, already and also in specialized raw food restaurants. And I decided to try it out, to make a raw chocolate caramel pecan cake. And I must say it turned out pretty well :) It was for my bday and I decided to make a cake only for 2 persons, I searched the internet and I ended up with this recipe (yes, I am not so experienced in raw food that I can do my first raw cake from scratch, but once we do the first one we see it is so easy and we keep doing!).


Follow the recipe and you will see how easy and how tasty it is! It is just delicious! Great for hot days, because it comes straight from the fridge! And besides, it doesn't have sugar in it and it is pretty healthy!!

Ingredients

1. Cake:

1 cup of pecan nuts
1 cup of dates (preferably the non-shinny ones)
1 tsp of vanilla
2 Tbsp of powder cacao

2. Caramel (filling)
3/4 cups of dates
1 tsp of vanilla
cinnamon and nutmeg, powder (about 1/2 tsp each, just to taste) - next time I will add cardamom powder
2 Tbsp coconut oil, melted
water (I used a little bit less than 1 cup)

Preparation

1. For the cake: add the pecan nuts in a blender or kitchen robot (I am lucky to have a bimby) and process until it looks bread crumbs. Add the other ingredients and blend until smooth. In a round baking pan of about 16 cm diameter, preferably the ones with spring, press the mix with the fingers, like a qiuiche dough and let the sides to be slightly elevated, so after we can pour the caramel in the middle. Leave in the fridge a couple of hours --> I did it the day before and let it stay overnight in the fridge.

2. For the caramel: add all ingredients together and blend until smooth, add water bit by bit until caramel texture is reached. Put it onto the base, it can also drip to the sides a little bit, to look yummy! Top with nuts of choice, I used more pecans!


It couldn't be easier!!

Sunday 26 April 2015

Receita de bolo de chocolate super fácil *Easy chocolate cake recipe*

 *Scroll down for English version*

 Entre outras coisas, este fim-de-semana foi para treinar uma receita de bolo de chocolate (super fácil), para depois fazer cakepops! Nunca fiz, acho engracados, mas nunca me interessaram muito ou o bastante para os fazer. Talvez pela quantidade de decoracão/enfeites, quantidades abusivas de acúcar e talvez por eu achar que eram mais como um brigadeiro espetado num palito gigante do que um bolo decorado :D Sempre a aprender, afinal são engracados e agora estou curiosa! Ainda não vai ser agora que os vou fazer, porque este bolo de chocolate não vai sobrar para fazer os cakepops ;) mas a receita está aprovadíssima!! :D

Aqui está a receita (sem o topping, pode levar morangos, chocolate derretido, o que quiserem):

  • Ingredientes

3 xícaras de farinha
2 xícaras de acúcar (usei 1.5 de acúcar amarelo Sidul)
1 c. chá sal
2 c. chá bicarbonato de sódio (depois da desgraca dos cupcakes, ando com receio e usei só 1.5)
1/2 xícara de cacau em pó (usei orgânico, fairtrade)
1 c. chá de cardamomo em pó (opcional, também se pode substituir por canela) 
3/4 xícara de óleo (de girassol)
2 c. chá acúcar baunilhado
2 c. sopa de vinagre (usei de cidra)
2 xícaras de água fria

  • Preparacão (mais fácil não há)

Peneirar/juntar todos os ingredientes secos numa tigela. Adicionar todos os ingredientes líquidos e misturar bem! E já está!!! Usei uma forma de 24 cm, redonda, untada e enfarinhada e vai ao forno, pré-aquecido a 180 C, cerca de 30-40 minutos, até o palito sair seco (eu ainda guardei o palito para os famosos cakepops!)
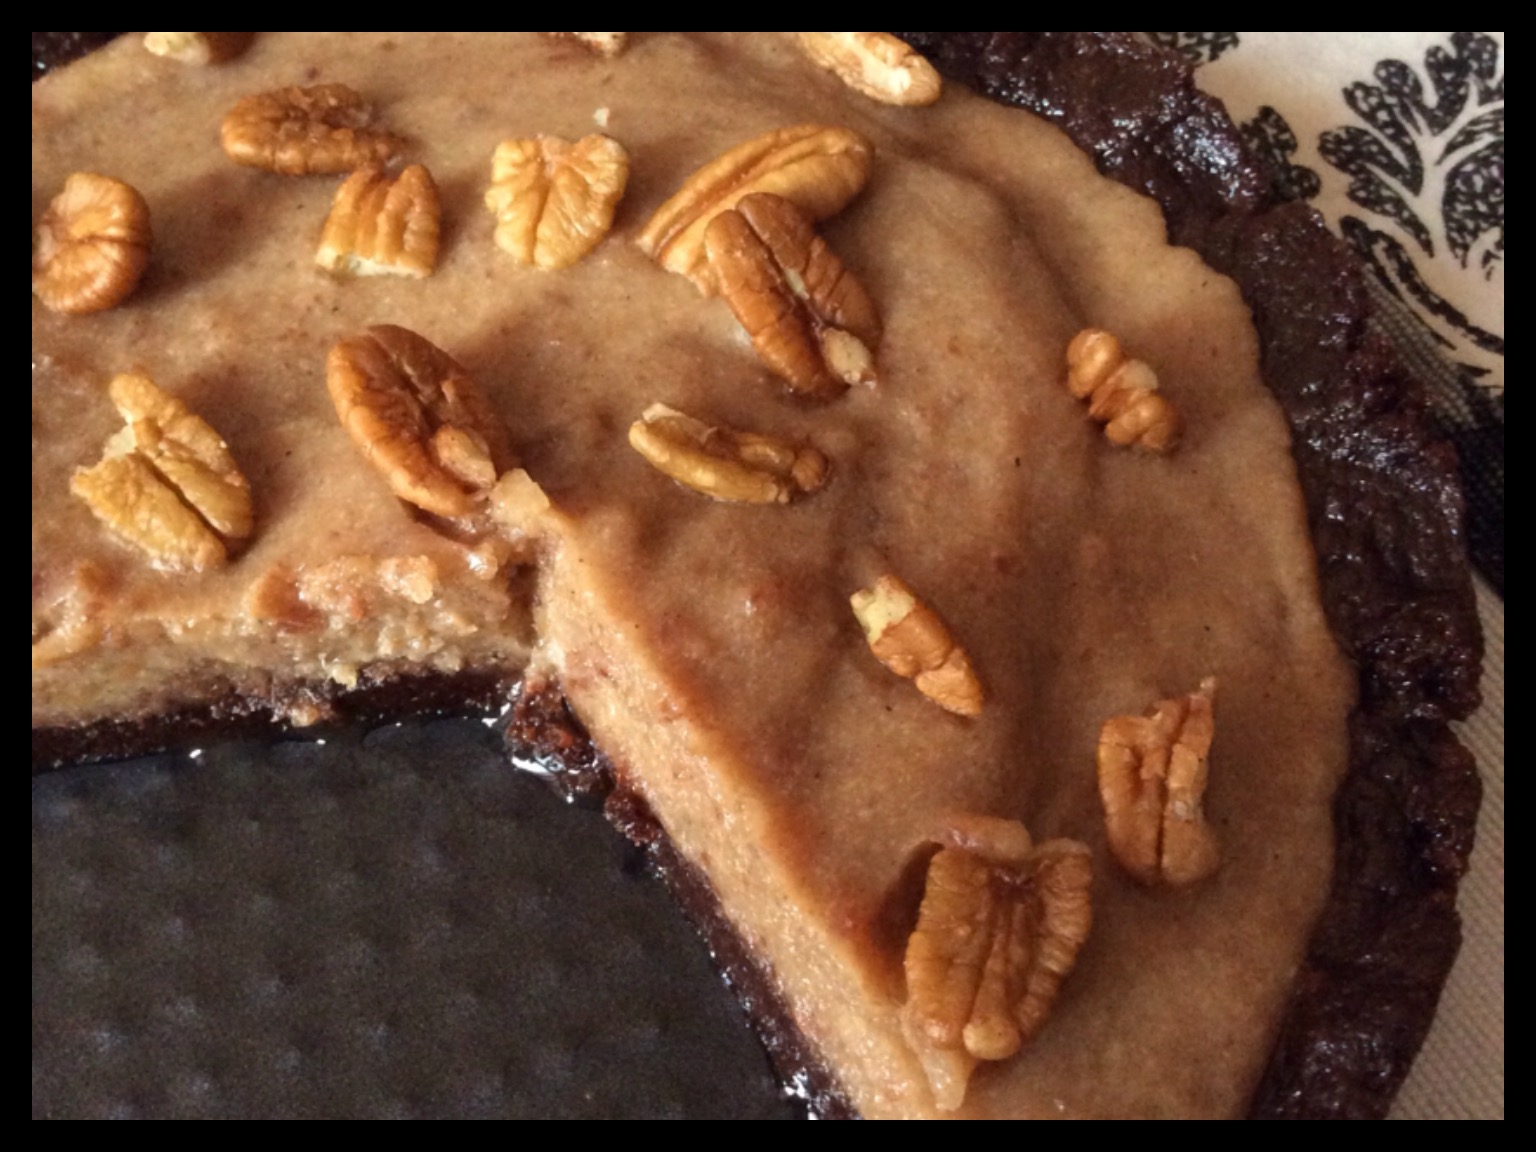

Lindo, não?!


E tenho de me aguentar para não o comer todo de uma vez!

***


Já há uns tempos que andava para fazer nutella! Adoro!! É daquelas memórias de crianca associadas a um sabor que só de pensar me fazem sorrir! Tinha guardado um frasco de nutella antigo para quando fizesse a guardar! Há imensas receitas na internet, é só ir ao Google e escrever "receita de nutella" e temos imensas, por isso escolhi uma aleatoriamente e alterei a meu gosto (menos óleo, menos acúcar e uma tablete de chocolate "especial").

Fiz na Bimby, mas pode ser feita num processador de comida de alta velocidade, ou numa picadora. Pensei que a receita desse para um frasco, mas afinal deu para 2 frascos e por momentos fiquei preocupada, porque pensei que não ia ser capaz de comer tudo e ia deixar estragar.. enganei-me! Assim que provei a dita apercebi-me disso, hehehe! Está óptima, sujei logo os dedos e a boca, tal e qual como quando era crianca e o mesmo sorriso voltou aos meus lábios!! :) Agora só estou preocupada, mas é por comer tanto chocolate de uma vez... ou não :p

Aqui está a minha receita:

  • Ingredientes

100 g avelãs, sem casca, torradas (usei orgânicas e torrei no forno, cerca de 25 minutos a 180 C, para depois ser mais fácil tirar a pele)
200 g chocolate culinária (usei uma tablete de 100 g chocolate amargo com avelãs, orgânico, da Vivani e 2 c. sopa cacau em pó, orgânico, fairtrade)
50 g óleo de amendoim
100 g de acúcar amarelo Sidul
200 g leite de soja (do LIDL)

  • Preparacão (para a Bimby)

1. Colocar no copo o acúcar e as avelão, dar 3 toques de turbo e triturar 4 x 30 segundos, vel. 8-9 (de cada vez fui raspando as paredes do copo, até formar uma pasta homogénea)

2. Colocar o chocolate 30 segundos, vel. 5

3. Adicionar o leite e o óleo 5 minutos, Temp. 50 C, vel. 4.

4. Para finalizar, 4 x 30 segundos, vel. 8-9

Guardei nos frascos esterilizados e agora está no frigorífico, penso que aguenta cerca de 2 semanas, quero testar, mas acho que a acabo antes!!


E assim é o meu fim-de-semana, cheio de chocolate!!! <3

***

Entre outras coisas, o desafio de 30 dias sem plástico continua e vejam o meu instagram! #DesperdícioZero


****


 So, among other things, this weekend was to practice a (super easy) chocolate cake recipe, so that after I could docakepops! Never tried making them, I find them funny, but never got into me or never had the will to make them. I don't know why, maybe because of the amout of toppings/garnish, abusive quantities of sugar that they have or maybe because I thought they would be more like a "brigadeiro"-on-a-stick than a decorated cake (still on a stick) :D Anyway, always learning, after all they are nice e now I am curious! This is still not the time I will make them, because the chocolate cake will be over soon, so I won't have enough for the cakepops ;) but it is an 100%-approved recipe!! :D

And here is the recipe (without the topping, you can add strawberries, melted chocolate, whatever you like):

  • Ingredients

3 cups of flour
2 cups of sugar (I used only 1.5 cup of Sidul yellow sugar)
1 tsp salt
2 tsp baking soda (after the cupcakes fiasco, I am afraid and I used only 1.5 tsp)
1/2 cup of cocoa powder (I used organic, fairtrade)
1 tsp cardamom powder (optional, can also be substituted by cinnamon powder) 
3/4 cups of vegetable oil (I used sunflower oil)
2 tsp vanilla sugar
2 Tbsp vinegar (I used cider vinegar)
2 cups cold water

  • Preparation (it cannot be easier)

Sift/add all the dry ingredients together in a bowl. Add all the liquid ingredients and mix well! And it's done!!! I used a round, 24 cm, baking tray, greased and with dusted flour and goes into the pre-heated oven at 180 C, for about 30-40 minutes, until you get a dry toothpick (I saved the toothpick for the coming cakepops!)


Beautiful, right?!


I have to forbid myself, not to eat it all at once!

***

Already for a while I wanted to make nutella! I <3 it!! It is one of those childhood memories associated with a taste that just thinking about it puts a smile on my face! I even kept an old nutella jar to keep it! There are tons of recipes on the internet, you just go to Google and type "nutella recipe" and there are too many, so I just chose one randomly and add my own touch to it (less oil, less sugar and a ver "special" chocolate bar).

I did it using Bimby, but it can be made in high-speed blender or kitchen robot. I thought the recipe would be just 1 pot, but after all I got 2 e for a few moments I got worried, because I thought I wouldn't be able to eat it all and it would go to waste.. but I was wrong! As soon as I tasted it I realized, it WON'T go to waste, trust me! It is sooooo good, immediately I made a mess with my fingers and mouth all fool of chocolate and, exactly as it was when I was a child, I smiled!! :) Now I am worried, but it is for the huge amount of chocolate I have to eat all at once... or maybe not :p

Here is my recipe:

  • Ingredients

100 g hazelnuts, toasted and peeled (I used organic and toasted them in the oven, for about 25 minutes at 180 C, so it would be easier to peel them)
200 g dark chocolate (I used a 100 g dark chocolate bar, with hazelnuts, organic, from Vivani plus 2 Tbs of cocoa powder, organic, fairtrade)
50 g peanut oil
100 g Sidul yellow sugar
200 g soy milk (from LIDL)

  • Preparation (for Bimby)

1. Add the sugar and hazelnuts, pulse turbo 3 times and grind 4 x 30 seconds, speed 8-9 (each time I scraped the walls, until it forms an homogeneous paste)

2. Add the chocolate 30 seconds, speed 5

3. Add milk and oil 5 minutes, Temp. 50 C, speed 4.

4. In the end, 4 x 30 seconds, speed 8-9

I stored in sterilized glass jars and it is now in the fridge, I think it is ok for about 2 weeks, I would like to check it, but I believe it will be all gone way before that!!


And this is my weekend, full of chocolate!!! <3

***

Among other things, the 30 days without plastic challenge continues and check my instagram! #ZeroWaste

Sunday 19 April 2015

Reciclagem de bolonhesa de soja


Decidi fazer bolonhesa de soja, porque gosto de bolonhesa e já há imenso tempo que não fazia soja... Deu-me para o almoco, jantar e ainda tenho o suficiente para fazer uma lasanha e um empadão :)


Aqui está a receita!

Ingredientes:

    1 c. sopa de molho de soja
    100 g de soja granulada demolhada e escorrida
    1 cebola média, picada
    1 cenoura, picada
    2 dentes de alho, picados
    azeite q.b.
    Salsa a gosto
    400 g. tomate em pedaços (usei mais ou menos metade dessa quantidade em molho de tomate que já tinha feito)
    1/2 pimento vermelho, cortado aos bocados
    30 g vinho branco (opcional)
    Sal e pimenta q.b.
    1 c. sopa de oregãos
    1 c. sopa de manjericão seco
   
Preparacão:

1. Colocar a soja temperada com o molho a soja a hidratar durante cerca de 3 horas

2. Refogar a cebola, o alho, a salsa (juntar no final) num fio de azeite, cerca de 5 minutos

3. Juntar o tomate, o vinho, os temperos e cozinhar em lume médio, cerca de 10 minutos

4. Escorrer a soja e adicionar, juntamente com os oregãos, o manjericão, envolver no refogado com a ajuda de uma colher de pau e deixar cozinhar em lume médio cerca de 15 minutos


Acompanhar com massa, arroz, salada, ... polvilhar com "queijo" ralado, se preferir. Pode ser congelado.